Python Runner/Debugger
An obvious requirement for a Python editor is to run your Python code. For standard Python, Mu does this in two ways:
With the Python runner (press the “Run” button).
With the graphical debugger (click the “Debug” button).
Note
For MicroPython based modes, the code is run on the attached embedded device and not directly by Mu. For example, saving your code on an Adafruit board restarts the device and Circuit Python evaluates your code.
Both the Python runner and grapical debugger were created with the financial support of the Raspberry Pi Foundation.
If you are creating a new standard Python mode for Mu, you should at least make available the Python runner (please see Modes in Mu for more information about how to do this).
Both methods of running Python code essentially work in the same way: they
fire up a new child process and connect its stdin, stdout, stderr to the
PythonProcessPane found in the mu.interface.panes namespace so you’re
able to interact with it in a terminal like environment.
However, the Python runner starts immediately whereas the debugger has to set up a bunch of debug-related scaffolding, which makes it start slower. This is especially noticeable on the less powerful Raspberry Pi machine. Basically, if you just want to run your script, use the Python runner.
Python Runner
The essentials of the Python runner are in the afore mentioned
PythonProcessPane class. The start_process method is used to create the
new child process. The resulting process becomes a process attribute on the
instance of the PythonProcessPane.
You have some control over how the child process behaves.
You should supply the
script_nameto run.You must also provide a
working_directorywithin which the script will run (this is usually the user’smu_codedirectory).The
interactiveflag (which defaults toTrue) will mean the user will drop into a simple Python REPL when the script completes. The default is at the request of the Raspberry Pi Foundation who explain that it is often handy for beginner developers to run their script and then explore the resulting context interactively.If the
debuggerflag is set toTrue(the default isFalse) then the debug runner (see below) is started in a child process for the referenced script. This overrides theinteractiveflag to beingFalse.Any
command_argsfor the referenced script should be a list of strings. The default is nocommand_args(i.e. None).
Handlers are configured to handle various events, such as when the process finishes or when a user type a character.
The PythonProcessPane includes basic command history and input editing
features. It’ll also respond to CTRL-C and CTRL-D. Copy and paste can be
accessed via a context menu.
Graphical Debugger
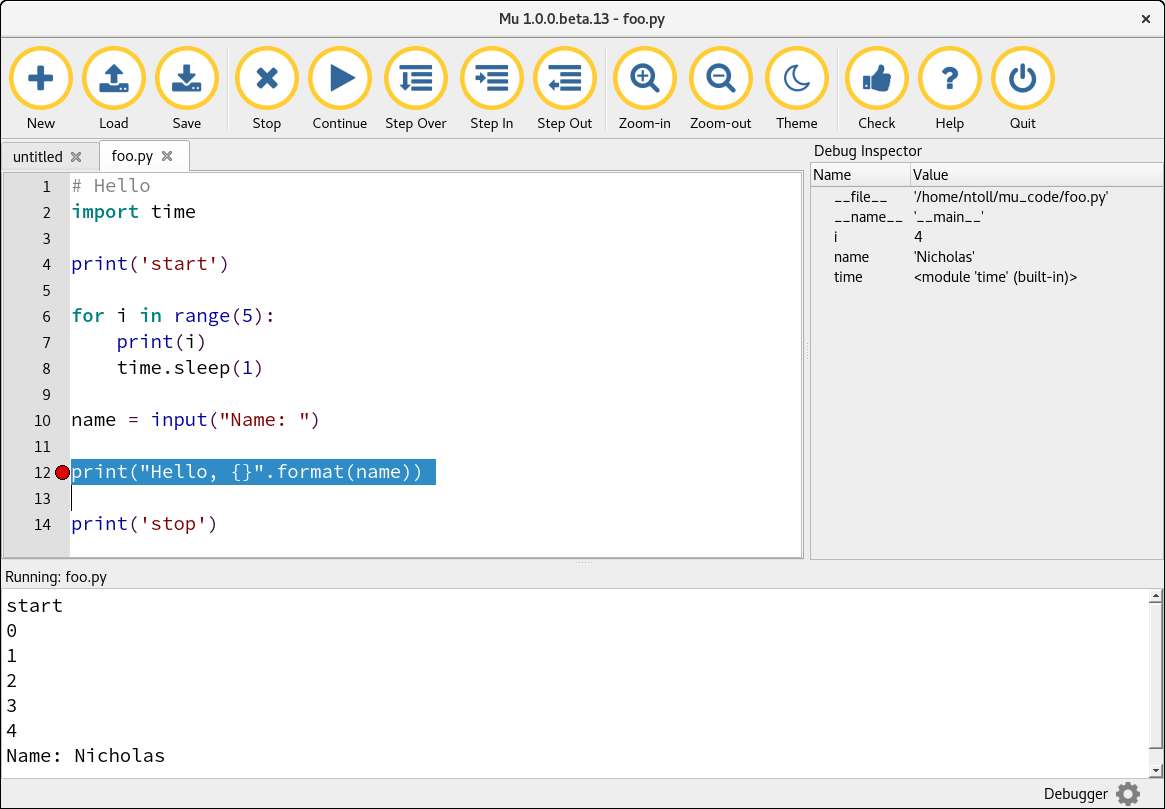
The graphical debugger exists to give beginner programmers an easy way to observe their code while it is running and allows you to use breakpoints, step over and into code as well as use a simple object inspector to view the status of objects in scope.
When a user clicks the “Debug” button Mu transitions to “debug” mode which exposes the functionality of the debugger client which, in turn, communicates with the debug runner process which is actually driving the user’s script.
The debugger is designed to be as simple as possible in order to introduce beginner programmers to the basic concepts of a debugger in the easiest way. It does NOT strive to be extensive or particularly powerful. Rather, its aim is to encourage beginner programmers to explore their code while it is running.
In this sense if conforms to the Mu outlook of providing the first steps for a beginner programmer with a view to them quickly graduating to a “proper” development environment once they’ve found their feet.
Most of the debugger’s functionality can be found in the mu.debugger
namespace. Coordination is done in the mu.modes.debugger.DebugMode class.
Debug Client
The debug client exists within the Mu process. It spins up an instance of
the mu.debugger.client.CommandBufferHandler class in a separate thread to
handle inter-process communication in a non-blocking manner, so the UI thread
is never blocked.
The mu.debugger.client.Debugger class is used to react to incoming events
from, and as an API for Mu to issue commands to the debug runner. It uses a
reference to a view object to update the user inteface as events are
detected.
Debug Runner
The debug runner exists on a new child process and makes use of Python’s
bdb debugger framework. It
spins up a new thread to run the command_buffer function that listens for
incoming commands.
The most interesting aspects of the runner are found in the
mu.debugger.runner.Debugger class which inherits from the bdb.Bdb class
found in Python’s standard library. It responds to commands from the client
and sends messages when various events occur during the debugging process.
These messages are picked up by the debug client and reflected in Mu’s UI.
The mu.debugger.runner.run function is the entry point for the debug
runner and, as specified in Mu’s setup.py, is accessed via the mu-debug
command. This command expects at least one argument: the name of the script
to be debugged. Any further arguments are passed on to the script to be
debugged.